
Updated October 2026
Raised Spillover Spa Design: Waterfall Planning
An attractive spillover can leave a wet deck, an intrusive waterfall or a costly finish repair if the water path is settled after construction. Plan the crest, receiving pool level, waterproofing transitions and operating modes together before approving the raised spa detail.
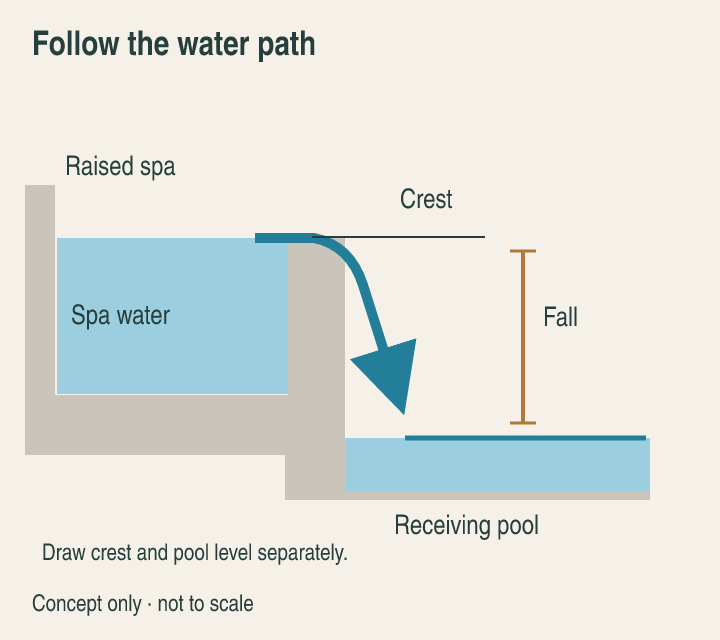
This guide is for an owner comparing design proposals for a built-in spa that spills into an adjoining swimming pool. It supplies a review worksheet and conceptual details, not construction dimensions. Start with the overall in-ground spa design before choosing the waterfall edge.
Quick design inputs
| Input or item | Value or source | Why it matters |
|---|---|---|
| Crest and pool water level | Coordinated section drawing | Defines actual fall, separate from deck height |
| Spillway width and edge | Dimensioned finish detail | Sets the water path and exposed interfaces |
| Operating modes | Designer’s hydraulic schematic | Shows circulation with feature on and off |
| Finish assembly | Selected system instructions | Coordinates substrate, membrane and facing |
| Wind and seating | Site plan and observation | Identifies splash and sound-sensitive locations |
| Pool cover path | Cover supplier drawing | Checks whether discharge lands on the cover |
Keep all elevations on the same datum. A spa described as “raised” can still have an ambiguous spillway if the drawing gives only the coping height. The pool and spa layout should show the receiving area and the walking route as well as the basin outlines.
Takeaway: Ask for a coordinated section and operating schedule before approving the finish.
Separate height, cross-level and forward water path
There is no universal raised-spa height or stone slope that can establish the finished effect on its own. Mark the crest where water leaves the spa, the receiving pool water level and the finished deck separately. A nominal 18-inch raised spa is a design description, not a general installation requirement or a promise of quiet water.
Across the opening, an unintended low spot can concentrate the overflow before the rest of the crest is wetted. Along the direction of travel, the lip and face detail determine where water is meant to detach. These are different checks: “level across the opening” does not prescribe the longitudinal slope, thickness or support of a custom stone slab.
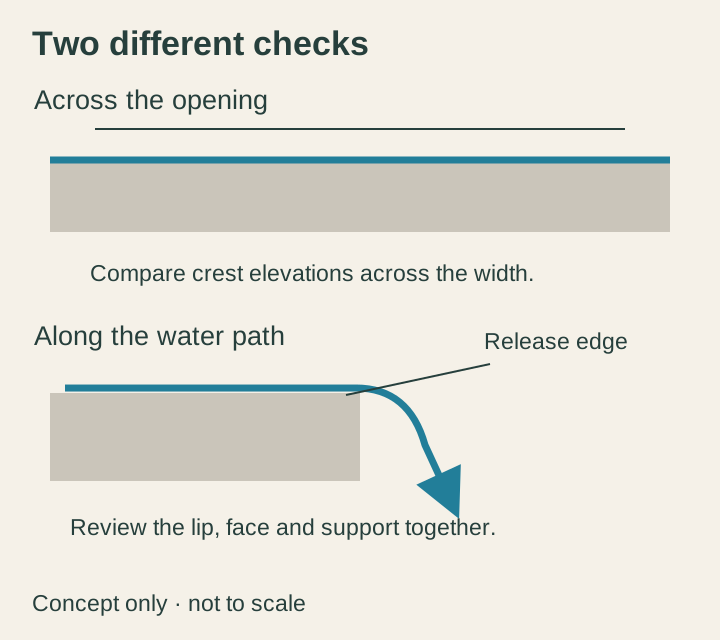
Pentair’s MagicFalls instructions provide a useful example of why the selected assembly matters: they require level setting, support beneath the factory lip and clearance past the finished face. Those are instructions for that manufactured waterfall, not a stone-spillway detail to copy. A built-in spa overflow and a separately fed waterfall insert also have different supply arrangements.
Common mistake: applying a roof, deck or factory-waterfall slope detail to a custom spa weir without the project designer’s review. Ask the detail to show both the wet face and the hidden interfaces.
Takeaway: Review the two directions of the crest separately; let the specified assembly determine the detail.
Follow the waterproofing through the spillway
A drawing of the visible tile or stone is incomplete without the substrate and waterproofing transitions underneath it. Request a compatible assembly for the selected vessel and finish, including the spillway corners, wall-to-floor interfaces and any movement joints. The coating name alone does not explain how a joint or penetration is treated.
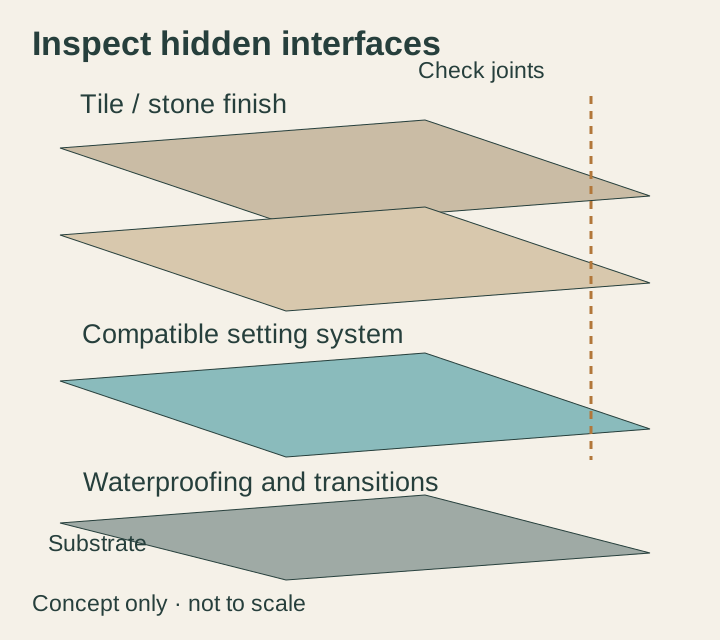
LATICRETE’s pool and spa installation guidance recommends a waterproofing membrane on the substrate and requires the installation system to cure before filling. It directs users to the applicable system documents. Do not turn that into one cure time for every coating, adhesive, grout and site temperature.
Before the finish hides the work, retain the product identifiers, preparation record and photographs of agreed inspection points. Ask the installer to identify the specified water-retention test and its acceptance criteria. Keep that record with the spa maintenance documents. This makes a later wet patch easier to investigate without assuming every stain is a structural leak.
Takeaway: Approve the complete system and its interfaces before the decorative surface conceals them.
Test the effect at the place people will use
Define what an acceptable waterfall looks and sounds like at the patio and seating positions. Ask the designer to demonstrate the intended range of operation, ideally with a representative sample or a comparable installation, then verify the finished project during commissioning. A video taken beside the water cannot establish how conversation will sound under your patio roof.
The MagicFalls manual explicitly describes wind sensitivity and deterioration of its sheet effect with increasing fall height. That supports checking exposure and drop, but does not establish a universal sound rating for a masonry spa. No decibel reduction or splash-free operating point is assumed here. Record where the water actually lands when the site is breezy.
Ask for an operating-mode schedule from the pool equipment designer: normal pool circulation, heated spa use, decorative spillover and cover-closed operation. For each mode, identify whether the spillway flows and how both vessels receive their required circulation. Turning a valve or stopping the filtration pump to silence the fall is not a design substitute.
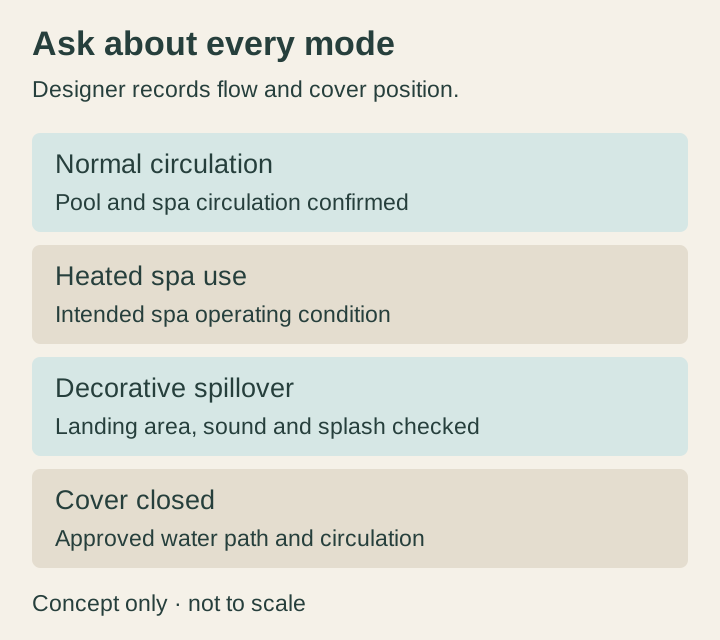
Coordinate the water landing area with the automatic pool cover path before either package is ordered. Obtain the cover supplier’s accepted interface detail; do not cut a cover or leave it partly open to accommodate an unplanned waterfall. Include the feature schedule in the heating and energy review rather than comparing heaters while ignoring the way the spa operates.
Takeaway: Accept the water effect and the circulation modes together, including the closed-cover condition.
Use a commissioning record with observable results
Agree the checks before filling, then record the observed result and who owns any correction. Replace vague acceptance such as “looks good” with the condition demonstrated. Keep the equipment settings in the handover documents rather than relying on a verbal tour.
| Check | Record | Reviewer |
|---|---|---|
| Crest and intended discharge | As-built elevations and visible flow across the opening | Designer and installer |
| Waterproofing before concealment | System, inspection photographs and specified test result | Installer and responsible inspector |
| Splash and sound | Mode, wind condition, water level and observation location | Owner and designer |
| Feature off and cover closed | Approved circulation and cover demonstration | Equipment and cover specialists |
| Handover | Mode names, care instructions and outstanding corrections | Owner and installer |
Document the separate barrier and safety review. A spillway is a water feature, not evidence that access control, suction safety or local inspection requirements have been satisfied. For a hotel or shared facility, involve the team responsible for commercial aquatic operations before the owner signs off.
Common mistake: accepting a full-width cascade at one high-flow setting while nobody demonstrates the everyday circulation mode. Record both conditions.
Takeaway: A signed record should connect each observable result to the operating condition that produced it.
When this does not apply
These sketches do not size a structural shell, reinforce a dam wall, calculate pipework or specify a waterproofing product. They do not establish a height, slope, flow rate or cure time. Existing cracks, unexplained water loss and water escaping near electrical equipment require qualified site assessment rather than a cosmetic edge alteration.
A negative-edge spa may discharge around a perimeter into a separate collection arrangement; a raised spa spilling into an adjacent pool is a different layout. Do not transfer collection or balance-tank requirements between them from a photograph. Portable hot tubs, public-pool approvals and site-specific winterization are outside this worksheet.
Takeaway: Use the checklist to commission project-specific design and verification, not to build from the illustration.
Frequently asked questions
Can I close an automatic cover below a spa spillover?
Only under the operating arrangement accepted by both the pool designer and cover supplier. Have them demonstrate the discharge path and circulation with the cover closed. A notch cut into the cover or a partly open cover is not an acceptable assumption for this design review.
Is one working spillway enough if a second one does not flow?
It does not establish acceptance of a design that specified two working openings. Record the two crest elevations and have the designer check the intended operating flow and distribution. Judge the delivered arrangement against the agreed drawing, not simply the fact that some water returns to the pool.
Why does my spa drain into the pool when the pump stops?
That observation needs a hydraulic diagnosis. Record the final water level and whether the change occurs with equipment running or stopped, then give the service technician the valve and plumbing information. Do not assume the visible spillway stone is the cause or change actuator limits from an online comment.
Which cover keeps heat in a spa attached to a pool?
Ask the cover supplier to detail the entire spa perimeter, including the lowered spillway edge and any operating clearance. A cover chosen only from the outside length and width may leave an unresolved opening at that edge. Confirm access, storage and operation together with the heating schedule.
Should a stepped spillover be changed to a single drop during a remodel?
Compare the proposed water path, access for cleaning, finish interfaces and sound at the seating position. A photograph of a different pool cannot establish that one arrangement will be quieter on your site. Require a revised detail and acceptance demonstration before removing the existing steps.
Can tile or stone be installed in a swimming pool or spa?
Yes, with an installation system specified for that vessel, finish and exposure. The selected manufacturer must address substrate preparation, waterproofing, joints, adhesive and curing before immersion. Suitability of a decorative tile by itself does not approve the rest of the assembly.
Takeaway: Use an owner question to define the inspection you need, not to diagnose concealed work from a photograph.
Method and sources
Reviewed October 2026. This is an editorial design-review worksheet based on published manufacturer guidance, with original conceptual diagrams. It reports no installed-project test, acoustic measurement or engineering approval. Community questions identify owner concerns; their comments are not installation instructions. Our editorial policy explains the separation between guidance and project-specific professional advice.
- Pentair MagicFalls Installation and User’s Guide — pages 2, 5–6: effect sensitivity, level placement and supported discharge edge; applies to that factory assembly.
- LATICRETE Thinsets FAQ — pool/spa tile installation and cure-before-filling guidance; check the selected system documents.
- Owner question: spillover and automatic cover (2022); uneven spillways (2023); spa drain-down (2024).
- Owner question: attached-spa cover (2024); stepped-spillway remodel (2026). Question discovery only; no repair advice adopted.
Takeaway: Bring the section drawing, mode schedule and commissioning record to the project team.
Related planning guides
- In-ground spa design — coordinate seating, heating and the vessel layout.
- Automatic pool covers — review cover travel and interfaces before committing the spillway.
Takeaway: Resolve the overall spa layout and cover interface before finalizing the edge finish.